Intro
In this blog, i’m going to show you how you can create & add environment variables into your android app project. using environment variables instead of hardcoded text is very important as it helps you to protect sensitive API keys & other data getting expose in codebase or git repo. apart from this, using environment variables also gives flexibility in setting various app configurations example: Free version & paid version of same app.
Create Android Project
now let’s get started by creating a blank android app project in android studio. all of this code will be available on my github repo, you can check the link in my description after watching this video, i will teach you 2 simple methods to create environment variables.
there are also other methods for using environment variables in Gradle, but i find these 2 quick & simple, if you want you can check official Gradle docs to learn more about it.
Method 1
first method is by using local.properties file. in your android app project, there is a file name local.properties in root directory of project.
this file is by default generated by android studio & also by default added to .gitignore file to ignore this file during git repo sync. that is why using local.properties file to save all your environment variables is much safer. open the local.propeties files & write a variable with it’s value. for this video, I’m writing variable name as var1 but you can write anything.
# local.properties file

var1=This is My Environment Variable in local.properties file
after this, now you have to load this variable from local.properties file into project & for that we will use gradle.build.kts file to load environment variables from local.properties file to project. there are 2 files, one is gradle.build.kts file on project level & other is gradle.build.kts file on Module level. you can use any file to load environment variables depending on your requirement but for this video, we will use gradle.build.kts file on Module level because later we have to display variable as text on mobile screen.
so open gradle.build.kts file of app module
import com.android.build.gradle.internal.cxx.configure.gradleLocalProperties

val myVar1= gradleLocalProperties(rootDir, providers)
             .getProperty("var1", "")

android{
   ...
   defaultConfig {
       ...
       resValue("string", "var1","\"" + myVar1 + "\"" )

   }

}
and at the top of file we will declare a variable name myVal1 which means my variables and use gradleLocalProperties function to load local.properties file and also import package import com.android.build.gradle.internal.cxx.configure.gradleLocalProperties on top of file otherwise there will be an error. now use getProperty function and mention name of variable that is var1 and also mention default variable as null or you can leave it blank.
now scroll down to defaultConfig function, here we will save the value of myVal1 variable in android xml string file, so that when we start gradle sync process, our environment variable value will automatically generate Strings in android XML which we can use in in App.
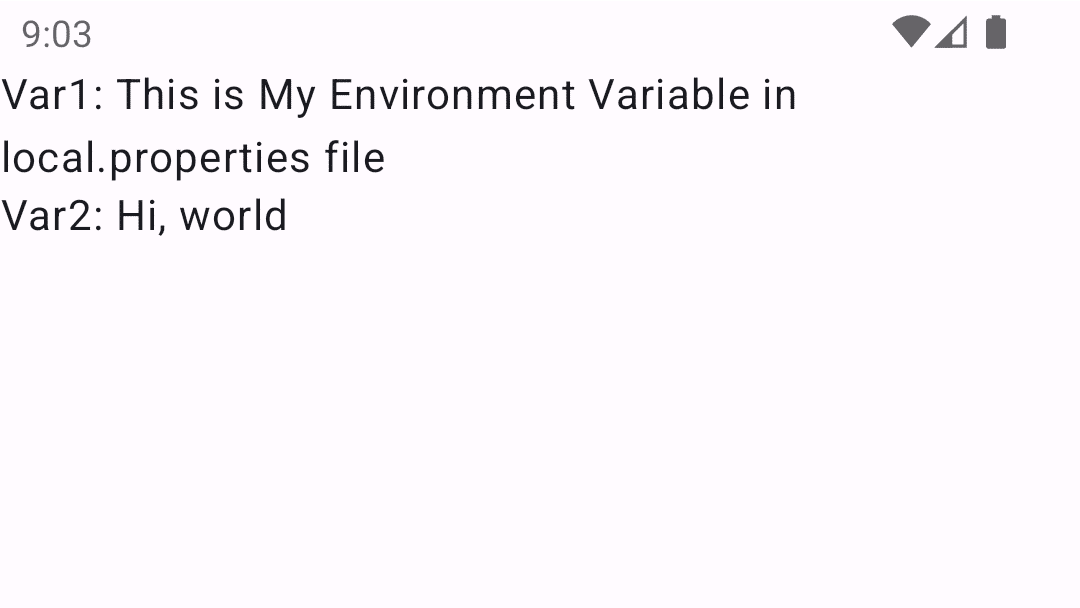
for this video, i have created a simple text element in jetpack compose to display text string which will display environment variable value on screen.
class MainActivity : ComponentActivity() {
    override fun onCreate(savedInstanceState: Bundle?) {
        super.onCreate(savedInstanceState)
        enableEdgeToEdge()
        setContent { MainScreenView() }
    }

    @Composable
    fun MainScreenView(){
        AppTheme {
            Scaffold(modifier = Modifier.fillMaxSize()) { innerPadding ->
                Column(modifier = Modifier.padding(innerPadding)) {
                    Text(
                        text = "Var1: ${getString(R.string.var1)}",
                    )
                }
            }
        }
    }


}
you can use it the way you want, just remember to use getString method to call value from Android XML Strings.
Method 2:
now let’s have a look at second method, which is slightly similar to 1st method but the only difference is instead of use local.properties file, we will use gradle.properties file to save all our environment variables. but be careful because generally gradle.properties files is not ignored by git by default because in this file we generally store various project configurations, so if you have any non-sensitive variables for your app config then this method is perfect.
open the gradle.properties file and write the variable with it’s value.
myProperty=Hi, world
just like previous method we will load this environment variable from gradle.properties file to project via build.gradle.kts file.
val myProperty = findProperty("myProperty") ?: "Empty Var !"

android{
    ...
        defaultConfig {
        ...
         resValue("string", "var2","\"" + myProperty + "\"")
        }
}
but we will use findProperty function and mention the name of variable. then scrolldown to default config and just like previously create a string value in android XML from gradle and finally perform gradle sync in project. created a simple text element in jetpack compose to display text of environment variable.
class MainActivity : ComponentActivity() {
    override fun onCreate(savedInstanceState: Bundle?) {
        super.onCreate(savedInstanceState)
        enableEdgeToEdge()
        setContent { MainScreenView() }
    }

    @Composable
    fun MainScreenView(){
        AppTheme {
            Scaffold(modifier = Modifier.fillMaxSize()) { innerPadding ->
                Column(modifier = Modifier.padding(innerPadding)) {
                    Text(
                        text = "Var1: ${getString(R.string.var1)}",
                    )
                    Text(
                        text = "Var2: ${getString(R.string.var2)}",
                    )
                }
            }
        }
    }


}
now debug & run the app and that’s it, it is as simple as it.
these are 2 simple methods to create & use environmental variable in your android app project. rest you can use your creativity on how to use it & use the way you like.


